Friday, December 18, 2015

post card and business card final

While given the task of creating business cards it required me to go on to moo to get ideas, there were so many to choose from, but being required to have to have one card having a photo and type text over it and the other having to be a pattern you make. I chose a flower that i took during the summer and then when i found a card that i liked i took the idea of the lines going through the picture and then adding the text that i need and i added mt name with what the card was advertising which was photography. 

I then had to work on the back of the card and i had to interpret my logo that i made during the year. i added the logo into the middle and then added 4 lines holding on to it. i then aded my full name on the top with lines under each word and then in the bottom right corner i added my information and what i was advertising (photography) and i also added lines on the bottom of each word.


below is my inspiration from from the from 


for my next card i had to make a brand new logo on the card, i went on moo again and saw a lot of snowflake ideas so i decided to incorporate a snowflake into my pattern after i made a lot of different snowflake and then made them into patterns i chose the one i best liked and it was the picture below and then  decided to put my logo that we had to incorporate again and i replaced one if the snowflakes for the logo.

i then worked on the back of the card and found inspiration for the idea on moo, the picture below is what i got my idea off of. i then added my name and what the card was for which was graphic design and then i added my contact info.


the next project was a post card, i saw so many christmas post cards so i decided to do one of my own. We had to put an inspirational quote on the post card so i added "Christmas isn't a season its a feeling" I then added some snowflakes on the sides to add some decoration.


After i was done with the front i worked on the back. i decided to add more text saying "greetings of the season" i then looked on the back of the moo designs and got how the back of the card is where they type where the address goes, and the postage stamp.

Wednesday, December 16, 2015

Reflection

This semester during E-com Video class we experienced and learned a lot new things. We made 5 videos this semester which included a procedure video, which was a video over any procedure we felt needed to be emphasized in our school. Emily, Abby and I made a procedure video over how to go to the nurse and what you need to do in order to go there.
The next video we did was interviewing another person about what they did over the summer, we made this video an audio video we dethatched the audio clips from the film and then we deleted the video to make this work, I interviewed Emily about her summer.
Link to over summer interview.
The next video video was an ONW NOW video this was a video about our partner’s hobby that most suited them. My partner was Conlin archer and his hobby was basketball, this one was a little bit more difficult then other videos because we had to collect B-roll and during class all of the gyms were occupied so we had to get the camera and rent it out to film in the morning. But besides that this project was very fun, I learned so much!
Link to partner’s hobby video.
The next video we did was the blood drive video, I was very excited about this video, I had watched some from previous years and thought it looked like a really fun project and it was! I thought it was fun not using a tripod to hold the camera and we actually hold it doing live footage.
Link to Blood drive video.
 The last project was the final ONW NOW segment; This project was journey it all started out with our class being split in half. After we had our groups we had to discuss a theme we wanted to base our video over. We decided individuality because it would go with almost everything and it was a good story concept to go over. We then had to assign different roles that were going to be involved in ONW NOW, I was teleprompter so I was in charge of making the words appear for the anchors to read off of while they are being filmed. We then discussed what activities we wanted to go and get interviews and B-roll over to complete the story, this was hard because everyone was so different with their schedules outside of school, after the pair of 2 partners were picked they then decided which event they wanted to film, Nicole and I filled Bowling tryouts at Mission bowl on a Friday. We had planned out everything we needed so that the trip would go smoothly and we would get everything we needed without disturbing the bowling tryouts that were going on. The coaches were so nice and let us barrow a couple of the bowlers during tryouts to let us interview them. I thought that was so thoughtful of them, after we got the interviews we started filming B-roll and then we were done it went so smoothly because we planned out what we needed and how we needed to get it.

The second half of the project was editing it all together. I had to make voice overs that went along with the story we were trying to get through to the audience, then we had to make the video by detaching the audio to all of the clips then arrange them how they were to make the J&L edits, then added the voiceovers in between the interviews.
After I was done editing our group discussed the intro that needed to be help in the beginning of the ONW NOW video. We all chose hobbies and our video was going to make it look like we were passing each other our hobbies but then they turned into what the other person hobby was and so on. After our whole bowling video was made we had to make a folder to hold all of the videos we needed for ONW NOW so that when it was time Mrs. B could collect all of the data and take it downstairs. When were were ready to head downstairs we were a little unorganized but this was bound to happen it was our first time every doing this, after we had finally got organized we headed downstairs everyone went to their positons and we got all of things we needed out of the way, a concern the anchors had was that when they were sitting/ standing they couldn’t see the words on the screen they had to read off. There was no way to fix it so we went along with it doing the best they could and they did, overall this project was very fun, learned so many new things that I will carry along with me for next semester.
link to ONW NOW Final

One major thing that I learned this semester was how to hold the camera without using a tripod while having the camera being steady as if it were on a real tripod, how to adjust the white iris and make sure the shot want to white or to dark. I learned to look at my audio levels to make sure all of the clips were around the same line so that they were even. I learned a lot more about J&L edits.

One thing that I would like to improve on next semester is making my voice over cleverer and more about the story I am trying to get through, not making them sound like I am actually interviewing, this will require me to work harder on the voice overs and putting more thought into what I am trying to say.


Wednesday, December 9, 2015

Radial Blur Tutorial

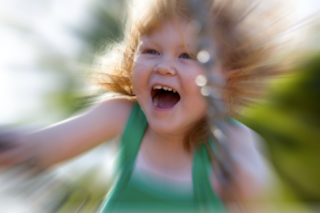
How to Radial Blur a picture and making 2 faces visible.
Step #1 Pick a picture that you would like to radial blur over. I chose a picture of me and my mom that was taken of us for our Christmas card.
Step #2 Add the photo into Photoshop. I chose a picture of me and my mom that was taken of us for our Christmas card.
 Step #3 use selection tool to grab the whole part of the picture you do not want to see blurred out. I chose my mom and I’s whole figure pictured in the picture.
 Step #4 command J to add a new layer
 
Stpe #5 I moved my image to the bottom right to make sure it was out of the way.
 
Step #6 Make sure you are on the background layer or else it will Blur the wrong image.  Go to filter, blur and then radial blur. I set my blur amount to 50, my blur method to zoom and my quality to best. Click OK when done.  Your image should look like the image pictured below.
 
Step #7 Click on the Layer 1 layer and make sure it is highlighted. 
 
Step #8 move the picture located in the bottom right corner back up to where it originally was located.
  
 Then you are done!!

If you want to add text on top of your photo follow steps below.

Step #9 click on the type tool.
 Step #10 I wanted my words to be located behind the layer 1 so I dragged the type layer and put it under the layer 1 layer.
Step #11 Add the text you would like and then your done!!
 

Tuesday, December 8, 2015

Logo Design Process

This past week we were given the task of creating a person logo for our self. While it was fun and interesting it was also very difficult. It started with us sketching 15 sketches of 3 main ideas. This was one of the hardest parts for me, when I get a topic I have to sketch over my mind goes blank, so it took me a while to get the ideas flowing. After we had the sketches we opened illustrator and got to working on making the sketches something realistic. This part was fun because I go to see all of the different things you can do with illustrator, while it was also difficult to get something the way you had it in your sketch. But after working on it for a bit it became easier. After we had made the 3 sketches in illustrator we now had to choose which one we best that corresponded with our personality. Out of 2 (top 2 pictures located below text) the first one is a simple A with the line going through the A extended to make it look like the O is balancing on it, then I added the apostrophe that is in my last name just to add some character. The second design I have reminds me of something you would see in the movie Avengers. So I made an O and then I added the A on top and used create outlines to make the line going through the A from the bottom right to extend to the top left of the line. Then I messed around with the colors and boarders, this logo was the one I thought best suited me because it is not as shy as the first logo it is more outgoing and fun!

The last photo pictured below was the first time playing with create outlines. It was really fun, and interesting. After we made our full name and found out a way to make them connect together. It was like a Thinking/puzzle game trying to figure out where letters would best be connect and which should not be connected.

Overall I thought this project was really fun, I learned so much this semester that I will take with me throughout my GD years. I love how close we all got to help each other to help one another out, how personal we made the items mean/feel, have and giving advice was such a great thing to inquire. From such lovely people that told us the truth about their opinion.


Monday, December 7, 2015

Photoshop mask's

Playing with the mask's was really fun. you got to see the different ways to use them to make different things look so unique. I learned a lot about how to work with the mask's and making different things with just one push of a button. 


Painting in Photoshop

Painting in photoshop was a actually fun, i didn't know that there were so many brushes to choose from. it was fun seeing the colors mix and before i never knew that there were very wet, wet, very dry and dry so that was fun to experiment with.


Thursday, December 3, 2015

Blurring object & painting

The blurring on an object was quite simple with the one face to start taking the blur away but right when i saw the picture i saw the picture i had chooses to blur i realized it was going to be a bit more complicated because when i tried unbarring are face and body it was not working, it was 20 minutes after trying to figure out how i was going to do this. I got the quick selection tool and selected me and my moms whole body. after we were all the way I selected and command J to make a new layer I dragged our body out of the picture and went back to original layer and blurred the whole picture then I addd the the picture of me and my mom and then I placed it where it belonged. then I was done, after i figured out how to do it, it was so simple, then added text describing my relation ship with my mom 

Wednesday, December 2, 2015

Mountain

Doing the mountain was quite complicated for me. I guess I just didn't really understand until the last minute so I had to rush on this project, but I think that it turned out a little better than I though it would turn out. After starting over and over again, the steps started become more at ease but i was confused on how to do it, but it did get turned in on time so it was a good process, I asked a lot of people for advice.

Tuesday, December 1, 2015

Making A Shadow

Making a shadow on an object of our choice was actually quite easy, making sure there was no pixel fringe. My process was, I got my image and copy and pasted a new layer, made original layer active and press command t to open transmit tool, press command or control and drag, to reposition press inside to made it to where you would like the shadow going. Lock that layer. Got to gradients and get black to white. Drag along the top of image, unlock and multiply blend mode go to filter and blur by 3 pixels.  And make the farther the image more blurred than the shadow closest to object.


Monday, November 30, 2015

Blood Drive Critique

Evan: beginning nat noise was good
He sounds like he needs a little excitement in his voice
Nick: placement of where B-roll was placed was good
Voice overs were kind of quite
Allison: good J and L edits
Rule of thirds was off with one person
Courtney: B-roll was very creative
A little jump cut while Austin was talking
Dema: creative voice overs
Hard to hear people being interviewed
Rosie: she got to the point quick and nicely
Camera a quite shaky at the beginning
Kiki: variation of a lot of things going on
Interviews were a little choppy
Rylee: good J and L edits
Voice over started a little late after one interview
Catherine: Got a lot of people in her video, nice variety
No name titles while interviewers popped up on screen
Alex: Good B-roll
Lots of pauses in voice over
Mitch: good quote he ended on
One shot had background noise while someone was talking
Nicole: good editing
Interviews were kind of quite
Drew: good attention on one person
Interviews were loud
Emily: good J and L edit
Voice overs kind of sounded like the questions asked
Conlin: funny quote to end on
Big pause after interview
Kyle: put nice research in Voiceovers
Variation in volume
Jacob: told a good story
J and L edits were that much used
Delaney: N/A
Abbey: creative voice overs
Iris was bright for an interview
Amy: good placement of all shots and B-roll
Couldn’t hear background noise at beginning
Chelsea: voice overs were really good
Voice overs didn’t really sound amused

I think I did a really good job on this project but when I saw it on the big screen I saw a couple of things I could improve. My first voice over sounded like an interview. The interview of Sophia was a bit quieter compared to the rest of the video, so I should of double checked the audio levels